Month: March 2013

New Model Diastasis Rehab® Splints in! Video of how to put on!

Thought you might want to be aware of the exciting news!  We have a NEW MODEL of Diastasis Rehab® Splint!!!  Now with Neoprene and improved back pad!
Watch below for wearing instructions and sizing instructions:

How to put on Tupler Splint

Get the RIGHT SiZE!
Measure the circumference of your body over your belly button.  Do this measurement in the evening when your belly is the largest.  Your muscles should be relaxed when you measure.
Sizes:
Extra Small:  24-27”
Small:  28 – 34”
Medium:  35- 38
Large:  39 – 42”
Extra Large: 43-52”
If you are one inch from the smaller size and you are trying to decide if you should go with the  go with the smaller size. Measure your back size.  This measurement is across your back from one underarm to the other underarm.  It is important that the pad not be too big for you.  It should not rest on the front of your belly.  So if your circumference is 28” and your back measures 10 to 12” then you should go with the extra small.  If your circumference measure 35” and your back measures 13-16” then go with a small.  If your circumference is 9” and your back measure 17 to 19” then go with a large.  In other words if you have anarrow back, go with the smaller size.
If you get the Splint and it is too small, you can sew a piece of hook Velcro at the end of each arm to make it longer.  It will probably fit you in a couple of weeks o wearing it and doing the exercises.  If it is too large you can make a hem in the length of each arm.
During pregnancy, you may want to get a larger splint, hem the arms and let it out as your belly gets larger.
If you do not have a measuring tape, measure with a piece of strong and theeasure the strong with a ruler.
As always, you can purchase right here on this site!  Look on the right hand side!
On a side note, I splinted during my entire 5th pregnancy with the 3 arm splint, and consistently did my 10 sets of Seated Tupler exercises, and kept my diastasis much smaller during this pregnancy because of the updated Splint which provides more coverage and more support.  It is not 4 weeks postpartum and my diastasis is closed, versus 7 weeks to close with baby #4, and 11 weeks after baby #3 (this one took much longer to close since I did not splint during or  after baby #3)  So glad I splinted with an updated splint during this pregnancy #5 and after!  Pictures to come!

Little Birth announcment for #5

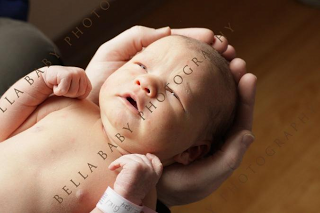
Thanks to everyone who has asked and inquired! We had #5 – on Feb 22nd – right on the due date.  It was a beautiful, albeit intense, water birth.  I got everything I wanted out of it (except the “quick” part).  Aside from the water birth, I wanted to keep the cord attached as long as possible, I wanted my husband to be my labor coach (and be a GOOD one), I wanted to have visualizations and relaxations as part of my coping mechanisms, I wanted essential oils to play a bigger part of the labor and birth experience, I wanted to nurse the baby with skin to skin contact before she was rushed off to be cleaned, bathed and measured, and I wanted to come from the experience with NO tearing and NO episiotomy. 

Colette Rebecca Wayne followed the trend of my other 2 girls and broke her own water – at least thats what it felt like (felt like her toenail snagged it) – and 15 hours later she was born.  I thought with #5 the labor would be so fast.  So while the “fast” part didn’t happen, it was beautiful, peaceful and very much cathartic after a traumatic birth from #4.  I got to use the Perfect Pushing® technique, and recovery has gone fairly smoothly, with just a couple short-lived snags.

I am loving this precious time to enjoy this cute new baby girl 🙂

FIRST FOUR PICTURES and HEADBANDS by TWINKLED TWIG and PHOTOGRAPHY BY AMANDA – LOVE how they turned out – I will post more to come!